This article was co-authored with generative AI. Facts have been checked against public documentation where feasible, but errors may remain. Please verify primary sources before relying on this for important decisions.
Overview
In the transfer workflow to archival institutions (archives, historical materials centers, document repositories, and the like), there is a step of building a SIP (Submission Information Package) from the accepted set of files. The standard tool CCA-Public/sipcreator is a PyQt5 app for BitCurator (Linux), and running it on macOS requires standing up a Docker container, connecting to a noVNC desktop in a browser, and executing commands from a terminal. That is a lot of steps for a non-technical staff member to use on a daily basis.
So I reimplemented this SIP creation workflow as a native macOS app that you can download, drag into the "Applications" folder, and use with a double-click. The source and the distributable (a notarized DMG) are published on GitHub.
- Repository: https://github.com/nakamura196/SIPCreator
- Release (v0.1.0, notarized DMG): https://github.com/nakamura196/SIPCreator/releases/tag/v0.1.0
Installation (For First-Time Users)
No technical knowledge is required, and you use none of Homebrew, Python, Docker, or the terminal.
- Open the Releases page
- Download the latest
SIPCreator.dmg - Double-click the downloaded
.dmgto open it - In the opened window, drag the
SIP Creatoricon to the "Applications" folder - Double-click
SIP Creatorin the "Applications" folder to launch it
Because it has been notarized by Apple, it launches without warnings. If a message such as "the developer cannot be verified" appears on the first launch, you can start it by right-clicking the app and choosing "Open."
The system requirements are macOS 14 (Sonoma) or later, and Apple Silicon (M1 or later).
How to Use
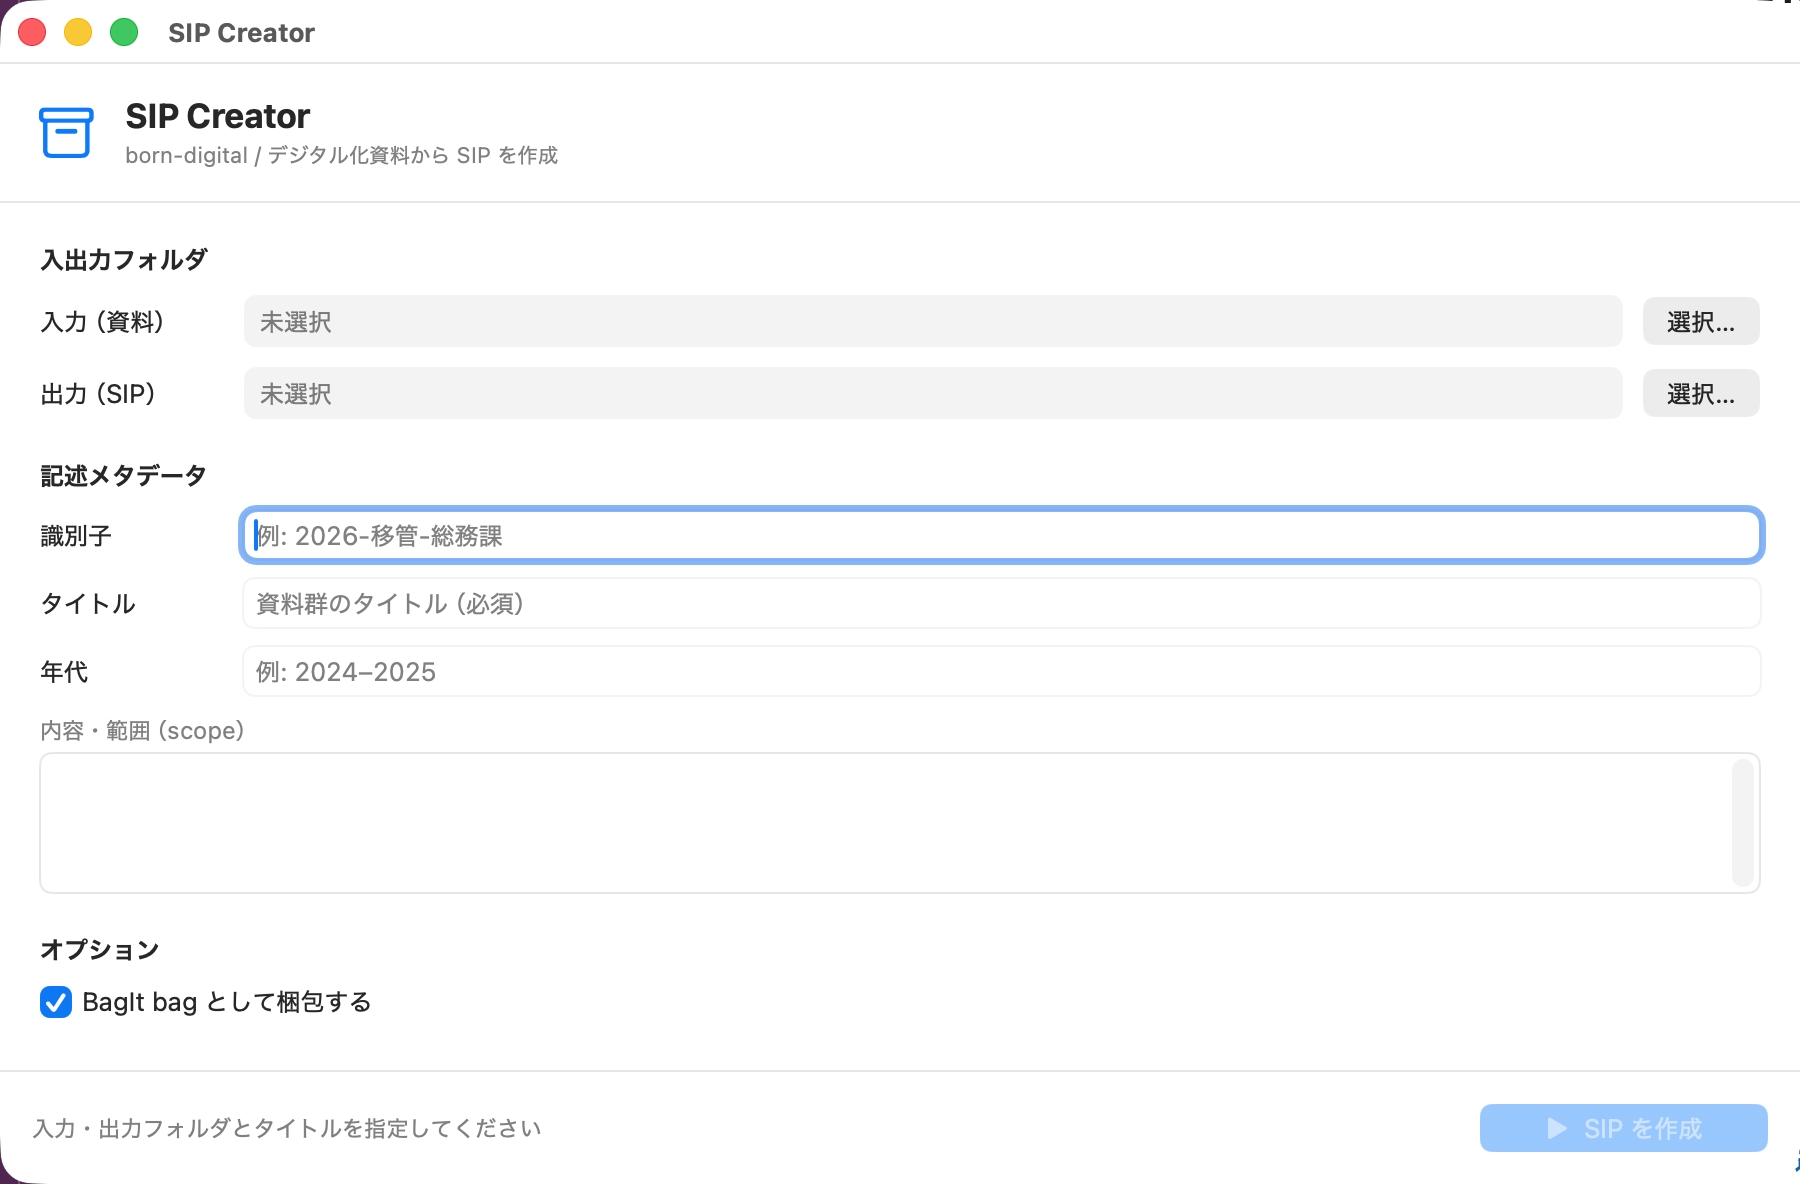
- Specify the input (materials) folder via "Select…" (the folder containing the files to be transferred)
- Specify the output (SIP) folder via "Select…" (where the SIP is saved)
- Enter descriptive metadata such as the title (required)
- Click "Create SIP" and a SIP (or BagIt bag) is generated at the output destination
You can see the actual flow of operations (folder selection → input → create → done) in the following operation demo (with subtitles, about 40 seconds).
(If the video does not display, you can view it from this link)
From here, I record the development background, the features, the differences from the upstream tool, and the flow from build through signing to release.
Background
As far as I investigated, I could not find a signed, native macOS app that performs the SIP creation workflow (format identification, checksums, descriptive spreadsheet, packaging) all together. The upstream tool presupposes Linux, and the closest, Brunnhilde GUI, is also Python/Qt and requires you to prepare the dependencies yourself.
The reason Docker or VNC becomes necessary lies not in the GUI itself but in the forensic CLIs it invokes internally (such as siegfried). Because the GUI can be built natively with SwiftUI, if you bundle just the identification engine siegfried into the app, users can use it with no additional installation.
What It Can Do
- Format identification (siegfried / PRONOM. PRONOM is the file format registry by The National Archives of the UK). Bundled in the app
- Checksums (SHA-256, Apple CryptoKit)
- Descriptive spreadsheet (
description.csv). For import into AtoM/ISAD(G) (the General International Standard Archival Description), it auto-fills the identifier, title, date range, Extent, and Scope - Technical inventory (
formats.csv), DFXML (Digital Forensics XML,dfxml.xml), HTML report (report.html) - Packaging (a SIP directory, or a BagIt bag)
Following the upstream tool, the output is gathered under metadata/submissionDocumentation/.
<SIP>/objects/...                          original files (relative paths preserved)
<SIP>/metadata/submissionDocumentation/
        ├ description.csv   AtoM/ISAD(G) description sheet (1 row per SIP)
        ├ formats.csv       technical inventory (per file)
        ├ dfxml.xml         technical metadata (DFXML)
        ├ report.html       HTML report
        ├ report.txt        summary
        └ checksum.sha256
Differences from the Upstream SIP Creator
Outputs that the downstream (Archivematica / AtoM / BagIt) can recognize are matched to the upstream tool, while some choices differ.
| Feature | Upstream | This app |
|---|---|---|
| Format identification (PRONOM) | siegfried | siegfried (same PUID) |
| Checksum | MD5 | SHA-256 |
| Descriptive spreadsheet (ISAD/AtoM) | Yes | Yes |
| DFXML / HTML report | Yes | Yes (custom implementation) |
| Virus scan (ClamAV) | Yes (from Brunnhilde) | No (delegated to the device's AV / Docker version) |
| PII scan (bulk_extractor) | Optional | No |
| Disk image analysis (fiwalk) | △ (from Brunnhilde, unused in SIP Creator) | No |
The upstream uses MD5 for checksums. In this app, I adopted the more collision-resistant SHA-256 (in the actual consideration of the transfer workflow, changing from MD5 to SHA-256 was also a point of discussion). Identification, SIP creation, the description sheet, DFXML, and the HTML report are equivalent to the upstream; the three things this app leaves out of scope are ClamAV, fiwalk, and PII (all of which I consider reasonable to delegate to separate tools or the Docker version).
The Flow from Build to Release
To launch without warnings in native distribution, signing and notarization are required. The flow is as follows.
- Implementation: build the app body with SwiftUI. The pipeline (traversal → siegfried identification → SHA-256 → spreadsheet/DFXML/report → SIP/BagIt assembly) is implemented in Swift, and the project is generated with XcodeGen
- Bundling siegfried: bundle the
sfbinary obtained viabrewand the signature DB intoResources/bin/, and identify offline - Testing: verify determinism (the same input yields the same SHA-256) and PRONOM golden values (
%PDF-1.4is identified asfmt/18= the same result as upstream siegfried) - Signing: sign with a Developer ID Application certificate and enable the hardened runtime. Re-sign the bundled
sfwith Developer ID as well (nested binaries must also be signed or notarization will not pass) - Notarization: submit to Apple with
xcrun notarytool submit --wait, and afterAccepted, attach the ticket withstapler staple - Distribution: create the DMG with
create-dmgand publish to GitHub Releases (gh release create)
A point where I stumbled: if
ENABLE_USER_SCRIPT_SANDBOXINGis enabled, the Run Script during the build cannot access the bundled binary and the archive fails. It was safer to sign the bundled binary not in the Run Script at archive time but withcodesignafter export.
For the distribution format, I split it into three layers: the GitHub README as the reference, the tutorial video as the how-to, and this article as the background and flow.
Summary
- The reason Docker or VNC was needed is not the GUI but the dependency CLIs, and bundling just siegfried makes it possible to go native
- While matching the upstream standards (submissionDocumentation placement, ISAD description sheet, BagIt), the checksum is changed from MD5 to SHA-256
- I carried it through signing and notarization, and distribute a notarized DMG that works with a double-click on GitHub
Related
- This app: https://github.com/nakamura196/SIPCreator
- The upstream SIP Creator: https://github.com/CCA-Public/sipcreator
- siegfried: https://github.com/richardlehane/siegfried
Comments
…