Overview
The Koui Genji Monogatari (Collated Tale of Genji) Text Database publishes text data from "Koui Genji Monogatari."

This time, I added PDF files like the following to the database.

This article describes how to create such PDF files using XSLT and TeX.
Cloning the Repository
Clone the repository as follows.
git clone --depth 1 https://github.com/kouigenjimonogatari/kouigenjimonogatari.github.io
Then install xslt3 with the following command.
npm i xslt3
Creating the XSL File
This time, we first convert the TEI/XML file to a TeX file.
I created the following XSL file.
 GitHub
<?xml version="1.0" encoding="UTF-8"?>
<xsl:stylesheet version="1.0"
xmlns:xsl="http://www.w3.org/1999/XSL/Transform"
xmlns:tei="http://www.tei-c.org/ns/1.0">
<xsl:output method="text" encoding="UTF-8"/>
<xsl:template match="/">
\documentclass[a4paper,11pt,landscape]{ltjtarticle}
\usepackage{xcolor}
\usepackage{luatexja-fontspec} % fontspec を LuaTeX-ja と共に利用
\usepackage[top=2cm,bottom=2cm,left=2cm,right=2cm,textwidth=25cm]{geometry}
% スタイル定義
\newcommand{\person}[1]{\textbf{\color{blue}#1}}
\newcommand{\place}[1]{\textit{\color{green}#1}}
% 日本語フォント設定
\setmainjfont{Noto Serif CJK JP} % 日本語フォントを指定
\title{<xsl:value-of select="//tei:title"/>}
\date{}
\begin{document}
\maketitle
% 本文
<xsl:for-each select="//tei:seg">
<xsl:apply-templates/>
\par\medskip
</xsl:for-each>
\end{document}
</xsl:template>
<!-- 人名の処理 -->
<xsl:template match="tei:persName">
\person{<xsl:value-of select="."/>}</xsl:template>
<!-- 地名の処理 -->
<xsl:template match="tei:placeName">
\place{<xsl:value-of select="."/>}</xsl:template>
</xsl:stylesheet>
Using the previously installed xslt3, you can convert the TEI/XML file to a TeX file as follows.
npx xslt3 -xsl:xsl/tex.xsl -s:xml/xsl/01.xml -o:output/01/main.tex
An excerpt of the converted TeX file is shown below.
\documentclass[a4paper,11pt,landscape]{ltjtarticle}
\usepackage{xcolor}

\usepackage{luatexja-fontspec} % fontspec を LuaTeX-ja と共に利用

\usepackage[top=2cm,bottom=2cm,left=2cm,right=2cm,textwidth=25cm]{geometry}

% スタイル定義
\newcommand{\person}[1]{\textbf{\color{blue}#1}}
\newcommand{\place}[1]{\textit{\color{green}#1}}

% 日本語フォント設定
\setmainjfont{Noto Serif CJK JP} % 日本語フォントを指定

\title{校異源氏物語・きりつぼ}
\date{}

\begin{document}
\maketitle

% 本文
いつれの御時にか女御更衣あまたさふらひ給けるなかにいとやむことなきゝは
\par\medskip
にはあらぬかすくれて時めき給ありけりはしめより我はと思あかり給へる御方
\par\medskip
...
Creating the PDF File
Convert the TeX file to a PDF file using the following command.
lualatex -output-directory=output/01 main.tex
Additionally, to use the Noto Serif CJK JP font on macOS, the following was necessary.
brew install --cask font-noto-serif-cjk
Summary
In the following article, I created an HTML file that enables side-by-side display with IIIF images from the same TEI/XML file used in this article.
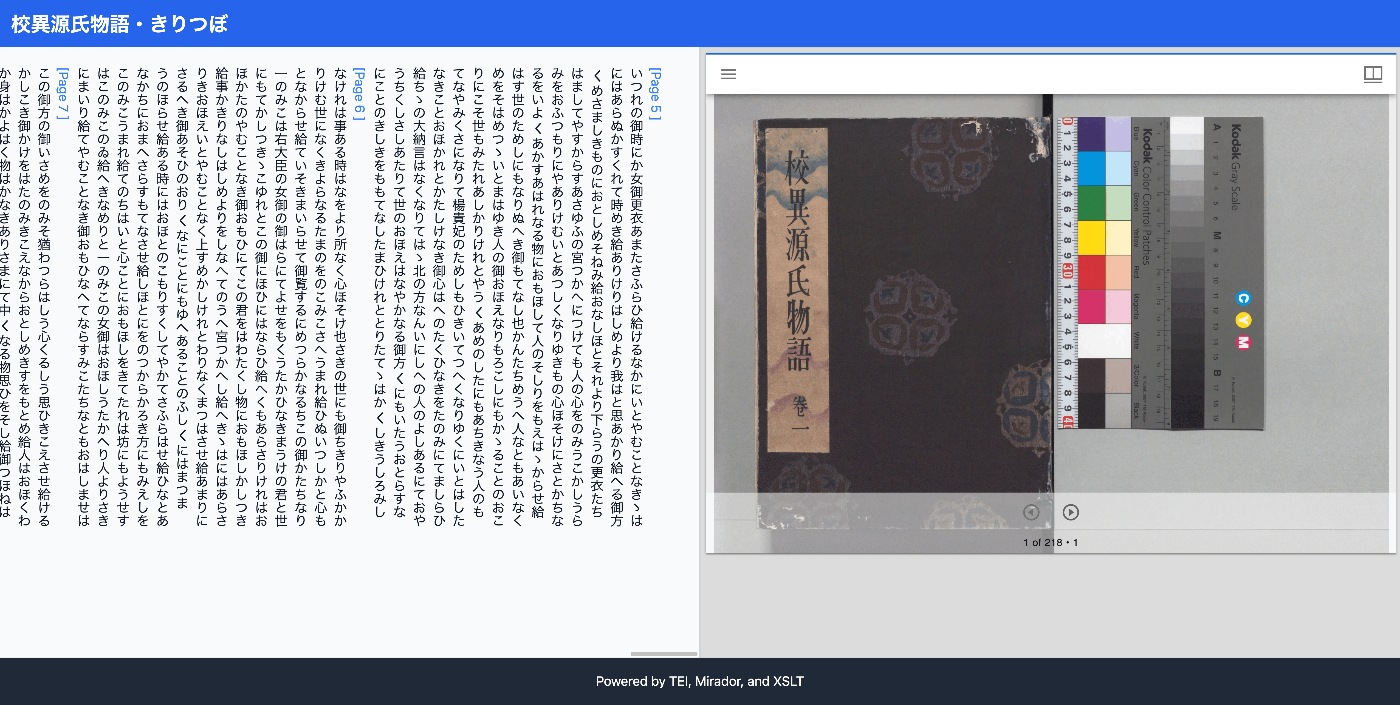
In this way, one advantage of creating text in TEI/XML is the ability to produce output tailored to different purposes using XSLT.
My understanding of TeX is still limited in many areas, but I hope this serves as a useful reference for working with TEI/XML.


Comments
…